
Imagine sinking your teeth into a luscious strawberry wrapped in a smooth, velvety coating made from carob – a healthier, delicious alternative to chocolate. Carob covered strawberries are not just a treat for your taste buds but also a wonderful way to bring a bit of indulgence into your life without the guilt. In this guide, we’ll walk you through everything you need to know to create these stunning delights. From the health benefits of carob to easy preparation tips, this article will help you master the carob covered strawberries recipe in no time.
Introduction to Carob Covered Strawberries
What Are Carob Covered Strawberries?
Carob covered strawberries are the perfect blend of natural sweetness and indulgence. Instead of traditional chocolate, these strawberries are dipped in carob, a nutrient-rich alternative made from the pods of the carob tree. Known for its naturally sweet flavor and smooth texture, carob is an excellent dairy-free, caffeine-free substitute for chocolate. Combining it with the juiciness of fresh strawberries creates a dessert that’s not only tasty but also visually captivating.
Why Choose Carob Over Chocolate?
Carob isn’t just a chocolate alternative – it’s a game-changer for health-conscious dessert lovers. Unlike chocolate, carob contains no caffeine or theobromine, making it suitable for anyone avoiding stimulants. Plus, it’s packed with fiber, antioxidants, and essential minerals like calcium. This makes carob covered strawberries a treat that’s not only good for your soul but also for your body.
Health Benefits of Carob-Based Desserts
What makes carob stand out in desserts is its naturally sweet taste, which eliminates the need for added sugars. This is ideal for those seeking to cut down on refined sugar without sacrificing flavor. Additionally, carob is vegan, gluten-free, and rich in polyphenols – powerful antioxidants that help combat inflammation and promote overall health. Pairing it with strawberries, which are loaded with vitamin C and other nutrients, creates a dessert that’s as nutritious as it is delicious.
Ingredients and Equipment Needed
Essential Ingredients
To make the perfect carob covered strawberries recipe, you’ll need just two main ingredients, but the quality of these ingredients is crucial. First, choose fresh strawberries. Look for bright red berries with intact green leaves – they should be firm, unblemished, and fragrant. The better the strawberry, the better the final result!
The second ingredient is carob chips. While store-bought options are available, homemade carob chips offer superior taste and health benefits. Using a mix of organic carob powder and cacao butter guarantees a rich, smooth coating that perfectly complements the strawberries’ natural sweetness.
Recommended Equipment
The tools you use can make or break your carob covered strawberries recipe. A double boiler is essential for melting the carob chips evenly without scorching. If you don’t have one, you can use a heatproof bowl over a simmering pot of water as a substitute.
Line a baking tray with parchment paper to prevent the dipped strawberries from sticking as they set. For dipping, fruit skewers or forks will give you better control, ensuring the carob coating stays smooth and even. Keep a few small bowls handy for toppings if you want to add a creative flair.
With just these simple ingredients and tools, you’re all set to begin crafting this easy yet elegant dessert!
How to Prepare Strawberries for Coating
Selecting the Best Strawberries
When it comes to the carob covered strawberries recipe, choosing the right strawberries is the first step to success. Pick medium to large-sized berries with their green stems still attached. The stems not only add to the presentation but also make dipping much easier. Additionally, make sure the strawberries are ripe but firm – overly soft berries may fall apart during the coating process.
Cleaning and Drying the Strawberries
Proper preparation is key to getting that flawless carob coating. Start by gently rinsing the strawberries under cold water to remove any dirt or pesticides. After rinsing, lay them on a paper towel and carefully pat them dry. This step is critical because any moisture left on the strawberries will prevent the carob from sticking properly.
Let the strawberries sit at room temperature after drying. Cold berries can cause the melted carob to harden unevenly. If you rush this step, you might end up with a patchy coating – and nobody wants that!
With your strawberries clean, dry, and at the right temperature, you’re ready to move on to the next step: melting and preparing the carob. Stay tuned for Part 4 to learn the best techniques for achieving a silky-smooth carob coating!
Melting and Preparing Carob Chips
Choosing the Right Carob Chips
For the smoothest, most luxurious coating, the quality of your carob chips matters. While store-bought carob chips can be convenient, using a homemade version guarantees a superior flavor and texture. You can easily prepare carob chips at home with just two ingredients: organic carob powder and cacao butter. This combination creates a silky, naturally sweet base that upgrades your carob covered strawberries recipe to new heights.
Melting Techniques for Perfect Consistency
Melting carob chips might sound straightforward, but precision is key to getting that flawless finish. A double boiler is your best bet for even heating. If you don’t have one, simply place a heatproof bowl over a simmering pot of water. Add the carob chips and stir continuously with a rubber spatula to avoid scorching.
Keep the heat low and make sure that no water or steam comes into contact with the carob chips, as even a single drop can cause the mixture to seize. Stir patiently until the carob melts into a smooth, pourable consistency. Once melted, allow the mixture to cool slightly before dipping to make sure a thicker, more even coating.
Dipping Strawberries in Carob
Dipping Process Step-by-Step
Now comes the fun part! Prepare your workspace by lining a baking sheet with parchment paper and arranging your washed and dried strawberries nearby. To dip, gently insert a skewer into the top of each strawberry. This guarantees an even coating and keeps your hands clean.
Carefully dip each strawberry into the melted carob, ensuring it’s fully coated. Twirl the skewer slightly to let any excess carob drip off, then place the dipped strawberry onto the parchment paper. For an extra touch of decadence, double-dip each strawberry after the first layer has set. This creates a thicker coating and gives a polished, professional look.
Setting and Drying Process
Allow the dipped strawberries to rest at room temperature until the carob coating hardens completely. Avoid refrigerating at this stage, as the sudden temperature change can cause condensation to form, ruining the smooth finish. Once set, your strawberries are ready for additional toppings or can be enjoyed as is.
For more delicious dessert recipes, check out this guide on creating indulgent brownies with a twist for more inspiration!
Creative Toppings and Variations
Decorative Toppings Suggestions
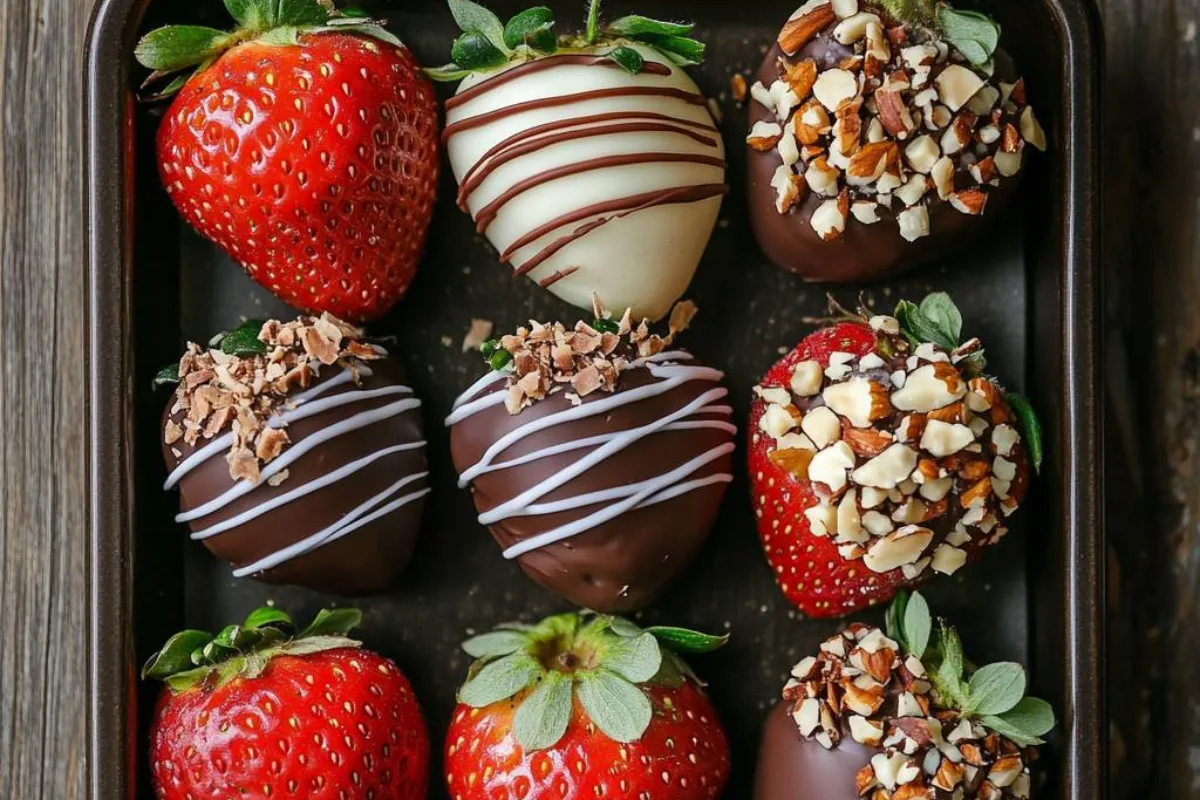
Once your strawberries are dipped and the carob coating is set, it’s time to upgrade them with fun and flavorful toppings. Sprinkle finely chopped nuts, like pistachios or almonds, over the wet coating for a delightful crunch. Alternatively, shredded coconut flakes add a tropical twist, while dried fruits like chopped apricots bring a hint of tanginess.
Looking for something more indulgent? Try a dusting of cocoa powder or a drizzle of caramel sauce. These simple additions not only upgrade the look but also take the flavor of your carob covered strawberries recipe to the next level.
Drizzling and Piping Ideas
A drizzle of carob hazelnut spread can add an artistic flair to your strawberries. Melt a bit of the spread and use a fork or a piping bag to create thin, delicate lines over the carob-coated surface. This technique adds texture and an extra layer of sweetness.
For special occasions, you can even add edible gold leaf or colorful sprinkles. These small touches make your strawberries Instagram-worthy and perfect for gifting.
Customizing for Special Occasions
The beauty of this carob covered strawberries recipe lies in its adaptability. For Valentine’s Day, decorate with heart-shaped sprinkles. During holidays, use red and green toppings or festive sugar crystals. Tailoring your decorations to the occasion makes this recipe versatile and fun to create.
Storage and Serving Tips
How to Store Carob Covered Strawberries
Proper storage is essential to maintain the texture and flavor of your carob covered strawberries recipe. Once the coating has set, place the strawberries in an airtight container lined with parchment paper. Avoid stacking them to prevent smudging or sticking.
Store the container in the refrigerator for up to two days. However, it’s best to serve the strawberries on the same day for the freshest taste and texture. Refrigeration may cause condensation, which can affect the smooth finish of the carob coating.
Serving Suggestions for Maximum Enjoyment
Serve these strawberries as a delightful dessert after dinner, or pair them with a glass of sparkling wine for a romantic treat. For a more playful option, arrange them on a platter alongside other fruits, nuts, and vegan chocolate for a sweet grazing board.
To add a touch of sophistication, use decorative wrappers or arrange them in a gift box. Whether you’re enjoying them at home or giving them as a thoughtful present, this carob covered strawberries recipe is guaranteed to impress.
Frequently Asked Questions
How Long Do Carob Covered Strawberries Last?
One of the most common questions about the carob covered strawberries recipe is how long they stay fresh. Ideally, these treats should be enjoyed the same day they’re made. However, if necessary, they can be stored in an airtight container in the refrigerator for up to two days. Keep in mind that refrigeration might cause condensation, leading to a slightly softer coating. For the best taste and presentation, serve them fresh and at room temperature.
Can I Use Other Fruits?
Absolutely! While strawberries are a classic choice for this recipe, the technique works just as well with other fruits. Bananas, apple slices, and even pineapple chunks can be dipped in carob for a delightful twist. Just make sure the fruits are firm and thoroughly dried to make sure the carob sticks properly.
What If My Carob Chips Don’t Melt Properly?
Melting carob chips can sometimes be tricky, especially if water or steam sneaks into the mix. If your chips seize up or don’t melt smoothly, don’t worry. Start over with fresh chips, ensuring your tools and workspace are completely dry. Using low heat and stirring continuously will also help prevent issues.
For more tips and inspiration, discover similar recipes like The Best Combination of Brownies & Cookies. With these answers, you’re all set to tackle any challenges in perfecting your carob covered strawberries recipe!
Conclusion: A Sweet and Simple Treat
Why You Should Try the Carob Covered Strawberries Recipe
Crafting your own carob covered strawberries recipe is more than just making a dessert – it’s about creating a treat that’s healthy, delicious, and visually stunning. With just a few simple ingredients and tools, you can transform fresh strawberries into an elegant dessert that’s perfect for any occasion. Whether you’re preparing them for a special celebration or simply indulging in a sweet craving, these strawberries are sure to delight.
Bringing It All Together
From selecting the freshest strawberries to mastering the art of melting carob chips, each step in this recipe is simple yet rewarding. The versatility of carob makes it a great alternative to traditional chocolate, offering natural sweetness without the guilt. Plus, with so many creative topping options, you can customize your carob covered strawberries recipe to suit your taste and style.
As you enjoy the fruits of your labor, remember that these strawberries aren’t just a dessert – they’re a thoughtful, handmade gift that shows you care. So gather your ingredients, follow the steps, and let your creativity shine. With this guide, you’re well on your way to making a treat that’s as fun to make as it is to eat!